
티스토리 뷰
리소스를 값으로 관리하는 방법에 대해 알아봅니다.
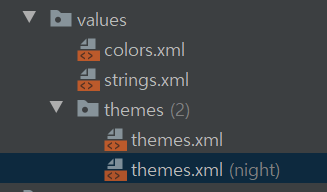
리소스 폴더에는 drawable, layout, mipmap, values 등이 저장되어 있습니다.
여기서는 values 부분에 대해 알아봅니다.
XML에서 콤포넌트 뷰를 제작할 때, 자주 사용되는 문자나 색상은 리소스의 값으로 저장한 후, 불러들여서 사용하면 편리합니다.
아래의 XML 코드를 살펴봅니다.
<?xml version="1.0" encoding="utf-8"?>
<LinearLayout
    xmlns:android="http://schemas.android.com/apk/res/android"
    android:layout_width="match_parent"
    android:layout_height="match_parent"
    android:orientation="vertical">

    <TextView
        android:id="@+id/text1"
        android:layout_width="wrap_content"
        android:layout_height="wrap_content"
        android:text="안녕하세요"
        android:background="#B10F0F"/>

    <TextView
        android:id="@+id/text2"
        android:layout_width="wrap_content"
        android:layout_height="wrap_content"
        android:text="@string/hello"
        android:background="@color/textView_color"/>


</LinearLayout>
id값이 text1인 텍스트뷰를 보면, 텍스트와 배경색이 직접 코딩되어 있습니다. 이러한 텍스트뷰가 엄청 많다면, 그만큼 관리포인트가 많아져서, 일일히 작업해야 합니다.
id값이 text2인 텍스트뷰를 보면, res-values의 colors.xml 및 strings.xml 파일에 미리 자주 쓰이는 색상이나 문구를 설정했기 때문에, 불러와서 사용한 경우입니다.
아래 처럼, colors.xml 및 strings.xml 파일에 설정했다면 말이죠.
colors.xml

<resources>
    <color name="textView_color">#673AB7</color>
</resources>
strings.xml
<resources>
<string name="app_name">My Application</string>
<string name="hello">안녕하세요</string>
</resources>
이렇게 리소스 파일에 값을 설정하면, 그만큼 자주 사용되는 색상이나 문자 등은 관리가 수월해집니다.
심지어 앱 테마 또한 설정하여, 원할때마다 AndroidManifest.xml 파일에 적용이 가능합니다.
아래의 코드를 살펴 봅니다.
<resources xmlns:tools="http://schemas.android.com/tools">
    <!-- Base application theme. -->
    <style name="Theme.MyApplication" parent="Theme.MaterialComponents.DayNight.DarkActionBar">
        <!-- Primary brand color. -->
        <item name="colorPrimary">@color/purple_500</item>
        <item name="colorPrimaryVariant">@color/purple_700</item>
        <item name="colorOnPrimary">@color/white</item>
        <!-- Secondary brand color. -->
        <item name="colorSecondary">@color/teal_200</item>
        <item name="colorSecondaryVariant">@color/teal_700</item>
        <item name="colorOnSecondary">@color/black</item>
        <!-- Status bar color. -->
        <item name="android:statusBarColor" tools:targetApi="l">?attr/colorPrimaryVariant</item>
        <!-- Customize your theme here. -->
    </style>

    <!-- Customized application theme. -->
    <style name="Theme.MyTheme" parent="Theme.MaterialComponents.DayNight.DarkActionBar">
        <!-- Primary brand color. -->
        <item name="colorPrimary">@color/textView_color</item>
        <item name="colorPrimaryVariant">@color/purple_700</item>
        <item name="colorOnPrimary">@color/white</item>
        <!-- Secondary brand color. -->
        <item name="colorSecondary">@color/teal_200</item>
        <item name="colorSecondaryVariant">@color/teal_700</item>
        <item name="colorOnSecondary">@color/black</item>
        <!-- Status bar color. -->
        <item name="android:statusBarColor" tools:targetApi="l">?attr/colorPrimaryVariant</item>
        <!-- Customize your theme here. -->
        <item name="android:windowNoTitle">true</item>
    </style>


</resources>
위에는 res-values의 themes.xml 내용입니다.
Base application theme는 안드로이드 스튜디오 설치 시 디폴트로 설정된 테마입니다. Customized application theme는 직접 제작한 테마입니다. 직접 제작된 테마에서도, textView_color를 불러와서 색상을 사용하였습니다.
<item name="android:windowNoTitle">true</item> 이 부분과 같이, 테마의 특정 기능을 없애거나 추가하거나, 변형시킬 수 있습니다. 해당 태그는 앱 실행 시 타이틀이 나오는 부분은 없애주는 역할로 자주 사용됩니다.
자신이 만든 테마는 AndroidManifest.xml 파일에 적용시키면 됩니다.
<manifest xmlns:android="http://schemas.android.com/apk/res/android"
    package="com.example.myapplication">

    <application
        android:allowBackup="true"
        android:icon="@mipmap/ic_launcher"
        android:label="@string/app_name"
        android:roundIcon="@mipmap/ic_launcher_round"
        android:supportsRtl="true"
        android:theme="@style/Theme.MyTheme"> //해당 부분 수정

        이하 생략

    </application>

</manifest>
위의 코드 처럼, 테마 부분을 자신이 만든 테마로 수정하면 바로 적용됩니다.
직접 코딩을 통해서도 리소스에 저장된 값을 불러 올 수 있습니다.
class Resource : AppCompatActivity() {
    override fun onCreate(savedInstanceState: Bundle?) {
        super.onCreate(savedInstanceState)
        setContentView(R.layout.practice_resource)

        //문자열 불러오기
        val hello_comment = resources.getString(R.string.hello)

        //문자열 불러오기2
        val hello_comment2 = getString(R.string.hello)

        //컬러 불러오기
        val color = getColor(R.color.textView_color)

}
저장된 값을 불러오는 경우, 위의 방법 처럼 resource에서 제공하는 getString 메소드를 사용해서 저장된 hello 값을 불러오거나, resource 없이 곧바로 getString 메소드를 사용해서 값을 불러올 수 있습니다. color 값 또한 마찬가지 입니다.
이때 resource는 AppCompatActivity()를 상속받기 때문에 사용이 가능한 것입니다.
practice_resource.xml 파일

<LinearLayout xmlns:android="http://schemas.android.com/apk/res/android"
    xmlns:app="http://schemas.android.com/apk/res-auto"
    xmlns:tools="http://schemas.android.com/tools"
    android:layout_width="match_parent"
    android:layout_height="match_parent"
    tools:context=".Resource">

    <Button
        android:id="@+id/color_button"
        android:layout_width="200dp"
        android:layout_height="200dp" />

</LinearLayout>
위의 practice_resource.xml 파일 내의 뷰에서 버튼을 만든다고 가정할 때, id값을 넣어주고 아래처럼 불러와서 버튼에 색상을 넣어줄 수도 있습니다.
class Resource : AppCompatActivity() {
    override fun onCreate(savedInstanceState: Bundle?) {
        super.onCreate(savedInstanceState)
        setContentView(R.layout.practice_resource)

        //버튼에 색상 넣기
        color_button.setBackgroundColor(getColor(R.color.textView_color))

}
이렇게 미리 지정해 준 id값을 통해서 setBackgroundColor 함수 인자로 getColor 메소드를 사용해 지정된 색상 값을 넣어주면, xml 파일에 따로 선언 없이 코딩으로 색상을 변경해줄 수 있습니다. 문자열 또한 마찬가지 입니다.
'Android App Coding' 카테고리의 다른 글
| 스레드 Thread (0) | 2021.07.09 |
|---|---|
| 컨텍스트 Context (0) | 2021.07.09 |
| 액티비티 <-> 프래그먼트 데이터 전달하기 (0) | 2021.07.08 |
| 프래그먼트 매니저와 트랜잭션 FragmentManager/Transaction (0) | 2021.07.08 |
| 프래그먼트 Fragment (0) | 2021.07.08 |
- Total
- Today
- Yesterday
- 안드로이드 스튜디오 에러
- 2021년 사건사고
- 선형 레이아웃
- 안드로이드 어댑터
- lazy init
- 2007년 사건사고
- 자바스크립트 배열
- addView
- findViewById
- 대한민국 미제사건
- 상대적 레이아웃
- tabLayout
- 안드로이드 앱 만들기
- 미제사건
- RecyclerView
- 리스트뷰
- 메소드 오버라이딩
- Bmi Calculator
- notifyDataSetChanged
- android adapter
- 2019년 사건사고
- bmi 계산기 만들기
- 안드로이드 프로젝트
- 뷰 바인딩
- 리사이클러뷰
- ToDo List 앱 만들기
- view binding
- 인텐트
- 탭레이아웃
- 애드뷰
| 일 | 월 | 화 | 수 | 목 | 금 | 토 |
|---|---|---|---|---|---|---|
| 1 | 2 | 3 | 4 | 5 | 6 | 7 |
| 8 | 9 | 10 | 11 | 12 | 13 | 14 |
| 15 | 16 | 17 | 18 | 19 | 20 | 21 |
| 22 | 23 | 24 | 25 | 26 | 27 | 28 |
| 29 | 30 |